
Quick Setup
This page is designed to get you up and running in Canvas quickly. You will find details on creating specific objects in Canvas.
Communication
Ways you can communicate with your students.
Create An Announcement
(Quick video – Announcement Creation )
Up to 3 announcements will appear on your Canvas course home page.
- Select “Announcement” in your course navigation
- Select the “+Announcement”
 Announcement Options
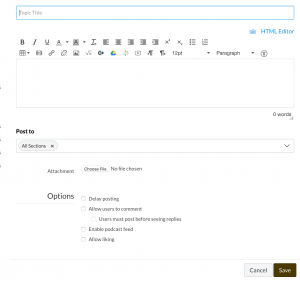
- Topic Title – Title of the Announcement
- Content Editor – What do you want to say to your students (can use; images, text or links)
- Post to: Selecting a different section will only post the announcement to the section you choose. By default it will post to “All Sections”. Normally this wont change.
- Attachments – Allows you to add a file attachment that a student would download (example: doc, pdf, xls or other types of files)
- Allow users to comment – Students can post their feedback
- Enable podcast feed – This allows students to read the announcements in an RSS reader (not common)
- Allow Linking – Allows the students to give a “Thumbs up”
Other Resources
Discussions
The discussions tool is a great way to get your students communicating with each other. We suggest adding links to individual discussions in the modules on your homepage.
 Create a discussion
- Select the “+” symbol to the right of the module you want the discussion to appear in
- Select “Discussion” from the add drop down menu
- Select “[ New Topic ]”
- Give the Discussion a name
- Select “Add Item”
 Edit the discussion
- Select the discussion in the module you want to edit
- Choose the “Edit” button
- Add the contentent you want your student to see. For example if this was an “introduction” discussion post you might say,
“Welcome to our first week. Please reply to this post with your name, a picture and a short reason you decide to take this class. Make sure to address your goal for the course and something unique about you.”
- Post to – Usually your going to post to All Sections but if this discussion was just for your graduate section choose the section from this dropdown
Options
- Allow threaded replies – Usually you want this checked. It give the ability to reply to replys
- Users must post before seeing replies – is it ok for your student to reply to a student before replying to your original post?
- Enable podcast feed – For RSS readers (no very common)
- Graded – Should this be a graded discussion
- Allow Liking – Give student the ability to “Thumbs up” a post
- Add to student-to-do – (if ungraded) places this discussion on their Canvas calendar
- Group Discussion – Should this be a group discussion? In my opionion its easier to create the greoup first before checking this box
- Available From – When can the students start posting (they can see the discussion details if published but cannot actually post till this date)
- Until – Whats the last date they can submit a post
Other Resources
Adding Materials
Quickly add materials like; files, pages and modules into your course.
Adding Files
Files can be anything from a Word document to a PDF to an Excel file. You can easily add them into a module or onto an existing page
 Add to an Existing Module
- Select the “+” symbol to the right of the module you want the file to appear in
- Select “File” from the add drop down menu
- Select “[ New File ]”
- Choose the “Choose File” button and browse your computer for the file you want to add
- Choose the “Add Item” button in the bottom right
Other Resources
Adding Pages
Pages are objects that can contain text, images and links. Their simple web pages and are easy to create. I think the easiest way to add a page is to add it to the module you want it to appear in.
Add a Page
- Select the “+” symbol to the right of the module you want the page to appear in
- Select “Page” from the add drop down menu
- Select “[ New Page ]”
- Give the new page a name
- Select “Add Item”
 Edit the new page
- Select the page which should now live inside the module you created it in
- Choose the “edit” button
- Give your page a “Title”
- Add the text, images and links you want to appear on the page
- Choose “Save”
Page Tips
To-Dos – If you want this page to appear on your students Canvas calendar check the “Add to student-to-do”. For example, you might want your students to read this page before the class on Wed. So you can add it to their Canvas calendar as a “to-do” item on Tuesday.
Home Pages: Please note that Canvas documentation will refer to selecting a page to be your course “Homepage”. UW System has turned off this functionality for all courses.
Other Documentation
Creating Modules
(Quick video – Adding Modules)
Modules are a great way to organize the content of your homepage. They are containers that hold: pages, files and assignments.
 Add a Module
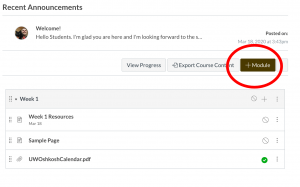
- Select the “+Module” button the upper right of your Canvas homepage
- Give your module a new name
- Choose the “Add Module” button
Organizing Modules
- Select the 6 dots to the left of the module title
- Click and hold and move the module above or below an existing module
Other Resources
Recording Videos
Quickly record and upload videos into your Canvas course.
Create a Screen Recording
(Quick video – Add Screen Recording Using Kaltura Capture)
Screen recordings are a great way to show student a process. You can record your voice along with all the actions you preform on your screen.
Use Kaltura Capture
Using this feature when you create and upload a video it will be available to all your courses.
- Login to Canvas
- Select “Account > My Media”

Install Kalture Capture
- Choose “Add New > Kaltura Capture” (you will need to install it, after installing go back to “Add New > Kaltura Capture)
Record Your Screen
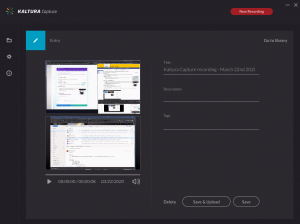
- Make sure to turn off the “Web Camera” by clicking its icon. It should have a grey slash over it
 The first icon allows you to choose the screen you want to capture
- Select the Microphone dropdown and choose the microphone you want to use
- Select the red “Record” button
- When your finished select the square “Stop” button and confirm “Yes, Im Finished”
Uploading Your Video
 You should now see your video an be able to change the title
- Choose “Save and Upload” button
- You will get an upload indicator. Please wait till it confirms the video has finished uploading
Add Uploaded Video to a Page
After you have a video to work with you can add it to a page. You can actually add video to any object that has a content editor. Such as;
- Pages
- Assignments
- Announcements
We will use a “Page” as an example but the process is the same for the others.
 Add Video to a Page
- Login to Canvas
- Create or edit a Page
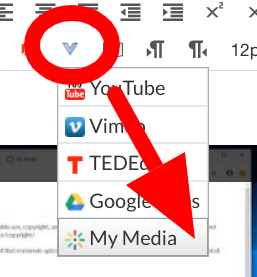
- Select the “More Tools” icon ( Looks like a V shape)
- Select the “embed button” next to the video you want to add to the page

Tip
If you do not yet have a video uploaded you can choose the “+ Add New” button to create a brand new video that gets directly added to the page. Please give this time to appear. This method requires Kaltura to process the video before displaying it.
Grading
This section will quickly go over;
- Grade Posting Policy – Do you want your students seeing the grade you give them immediately (before your finished grading) or do you want them to see their grades.
- Speedgrader – An awesome assignment annotation tool.
Grade Posting Policies
(Quick video – Grade Posting Policies)
 Select a grade posting policy
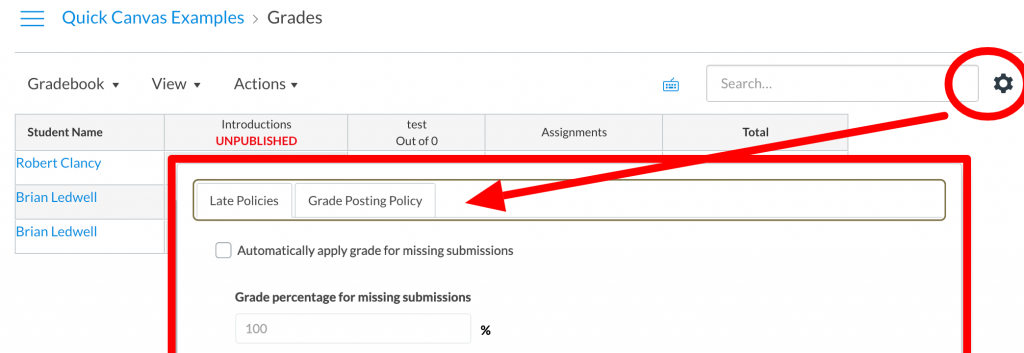
- Select Grades from your course navigation
- Select the gear icon (far right)
- Select the “Grade Posting Policy” ( Tab )
- Choose from the following policies
- Automatically (Default) – Student see the grade immediately
- Manually – grade will remain hidden untill you “post” them. ( I like this option).
What ever option you choose here will effect all the assignments in your course
 Finished Grading now Post the Grades
- Go to Grades in your course navigation
- (2) In the column header, locate any assessment name with the orange eye (
 ) icon indicating “hidden.”
 - (3) Hover over the assessment name until the 3 stacked dots icon appears. Click the three stacked dots.
- (4) Select “Post Grades”
SpeedGrader
After a student has submitted a paper you can use SpeedGrader to grade AND annotate the submission.
 Access SpeeedGrader
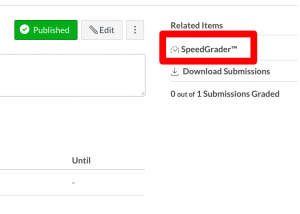
- Select the assignment that has had student submissions
- Choose “SpeedGrader” from the “Related Items” on the right side of the screen
Editing Tools
- Use the annotation tools along the top to comment on your students papers.
- Give the paper a grade

Tips
You can also use SpeedGrader on Quizzes as well.